When you first load Minecraft mine 4 blocks of wood and change them all into planks . Make one crafting table put 3 planks aside and turn the rest into sticks . Now make one wooden pick axe and mine cobblestone till it brakes . Now with your left over sticks make one of every tool plus an extra pickaxe and a furnace. After that find a cave and mine 2 pieces of iron when you are back on the surface make sheers and sheer 3 pieces of wool. Now break 1 piece of wood, make it into planks and make a bed. Quickly, mine a small hole in a mountain and block up the door. Now you can sleep and you have survived one of the 1000000000000000000000000 nights you will spend on that world.
Superflat (sometimes called Flatlands) is a world type replacing the normal varied terrain of the Overworld with customizable layers. On a classic superflat world, the terrain consists of one layer of bedrock, two layers of dirt, and one layer of grass; the surface of the world is completely flat and at height y = 4, with the exception of villages and terrain features, if they are enabled. Since the height limit (256) is unchanged, there is then slightly less than one-third more vertical height available to build above-ground structures as compared to a normal world. Mobs spawn as normal, including slimes.
Because of there being chests in villages, and villages frequently spawning near the spawn point, it is possible to use Superflat as a survival challenge map. However, the high amount of slimes makes this extremely difficult to an inexperienced player, if playing on any other than peaceful difficulty. The Nether and the End both generate normally (With the exception of the Console Edition for the Nether)That's a lot of tnt
You're going to start by making walls for the elevator. The dimensions should be 4x4 and the height can be whatever you decide! Keep in mind that before you choose your building material, it will need to blend nicely with the stairs that we will add later on.
Add a block in the ground to show visitors where they need to stand in order to activate the elevator. I marked the ground here with a stone brick block.
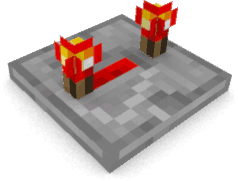
Step 2 Button
After you finished building your walls, you will want to add a marker. This is where your button will be placed later on.
Step 3 Spiral Staircase
Next you will want to add your stairs. Stand on the marker you made earlier on the ground and face to your right. Place the stair there, and continue making the spiral staircase all the way up to the top.
[1] First stair placement, [2] Outside view, [3] First and second stair placement, [4] Third and fourth stair placement... continue this all the way up!
Step 4 Holes
You now need to add holes. These holes are just guidelines to show where the sticky pistons will need to be placed.
The way this elevator works, the sticky pistons push 1 block from the wall... which in return pushes the player literally right up—one stair at a time. Keep this in mind when making your holes, and that will ensure that you are placing your holes correctly!
When you walk through the front entrance of your elevator, look to the left of the marker in the ground. 1 block up from the ground (2nd block up), that is the first hole you will need to break. Continue breaking 1 hole all the way to the top of your elevator.
**NOTE: Keep in mind that the blocks are NOT going to be pushing the stairs, they are going to be pushing players up the stairs! **
Step 5 Add Blocks
For this step, all you need to do is add one block below each hole you just created in Step 4.
Keep in mind that you are NOT placing blocks directly behind the holes... you're placing them 1 block down below each hole you just made.
Again, do the same thing all the way up to the top!
Step 6 Sticky Pistons!
Go inside of your elevator tower, and place 1 sticky piston on each block you just placed in Step 5. The sticky pistons will be one block back. Look at the images below for reference!
Step 7 Cover Up!
You will need to go back into the tower and cover each individual sticky piston with 1 block. This is the block that the sticky piston pushes, and in return will push the player right up the stairs!
Step 8 Redstone / Redstone Repeaters
This next step might seem tricky at first, but I promise it's easy!
What you will need to do is place a block behind your button marker (our button marker is red wool). Place redstone on top of this block, and place another redstone 1 block down so that it charges the block below the sticky piston.
Next, stand to the left of the sticky piston, and face left. Look down, jump and place a redstone repeater. Make sure that the redstone repeater is facing left, otherwise it will not work. Set the repeater to 4 (right-click 3 times to the last setting). I personally like this setting, as it's the slowest. But feel free to experiment with faster times. If you like a faster elevator, change repeaters to 2 (1 click) instead of 4.
Continue connecting the sticky pistons to redstone and redstone repeaters all the way to the top. Make sure you are doing a stair-like method (the only option) along the outside of the elevator. Keep in mind that the redstone will always power the block BELOW the sticky piston—the redstone never actually is beside the sticky piston.
Redstone Comparators function similarly to redstone repeaters. However, it receives two signals.The redstone comparator has four functions: maintain signal strength, compare signal strength, subtract signal strength, and measure certain block states (primarily the fullness of containers). If you want to make a quicker easier Redstone clock you can place a Redstone Comparator with a lever on its input end and wire from the lever past the side of the Redstone Comparator. If you have made it right the wire should start flashing (warning: if you put a Redstone repeater on the end of your wire it will stop working + don't forget to flick it once)
Redstone Repeaters can extend the current of a redstone wire beyond the 15 block limit, or to delay the incoming signal. The repeater also acts as a delay. The switch can be toggled by clicking it and has 4 settings: 0.1 second delay, 0.2 second delay, 0.3 second delay and 0.4 second delay. Input can come from a powered block, another repeater, a switch, a redstone torch or redstone wire. Note that the redstone wire must be wired directly into the correct side of the repeater. Wire laid across the input side will serve as input. Now you know what they do you can use them to extend power when you need Redstone to travel a long way or use them in a 4 by 4 grid with Redstone torches to make a Redstone clock.
Minecraft was changed (yet again) for the best . Command blocks were added you could do anything from summon meteors to shoot guns thanks to years of work from these amazing coders . You could use one command block to summon 10 more with different codes in like a sword that gives you buffs and has looting 1000 . A lot of pork chops. I found out yesterday that using just one command block you could time travel. If you write Add time set 200 and hook it up to a Redstone clock your wheat will grow in seconds. Unfortunately I did not take into account that your hunger would go down. I died of hunger and rage quit.
Redstone. It changed my life. So many possibilities you could change the world. The way it was used excelled so quickly. It started of with people making elevators but it is now used to make auto-smelters, robots and time machines. My favourite Redstone builds are mob grinders and auto-farms so I have tried thousands of different ways to build them but my favourite still is sugar cane being farmed by pistons on a Redstone clock.
Lately I have been testing mob grinders by putting 2 by 2 block platforms (obviously made of spawn able blocks) and trap doors around them (closed). Next you put a water source around the edge taking them to a 25 or more block drop. What's happening is the mobs think the open trap door is a whole block ,walk on to it and fall into the water source and drop to their gruesome death.
 That's a lot of tnt